Step-by-step walkthrough of Interview Assistant on Windows — from signing in with your Prep Desk account to connecting a live interview session. Screenshots below are from the real app.
Need an account first? Create one on the website, then open the desktop app with the same email and password.
Step 1
Install and open Interview Assistant
Download the Windows desktop app, then launch Interview Assistant. The window stays on top so you can keep it beside your meeting app.
Use the same Prep Desk email and password you registered on the website.
Plans, credits, and free-trial access sync from your web account — you do not buy a separate desktop license.
The shopping-bag icon in the title bar opens credits and plan details.
Step 2
Sign in
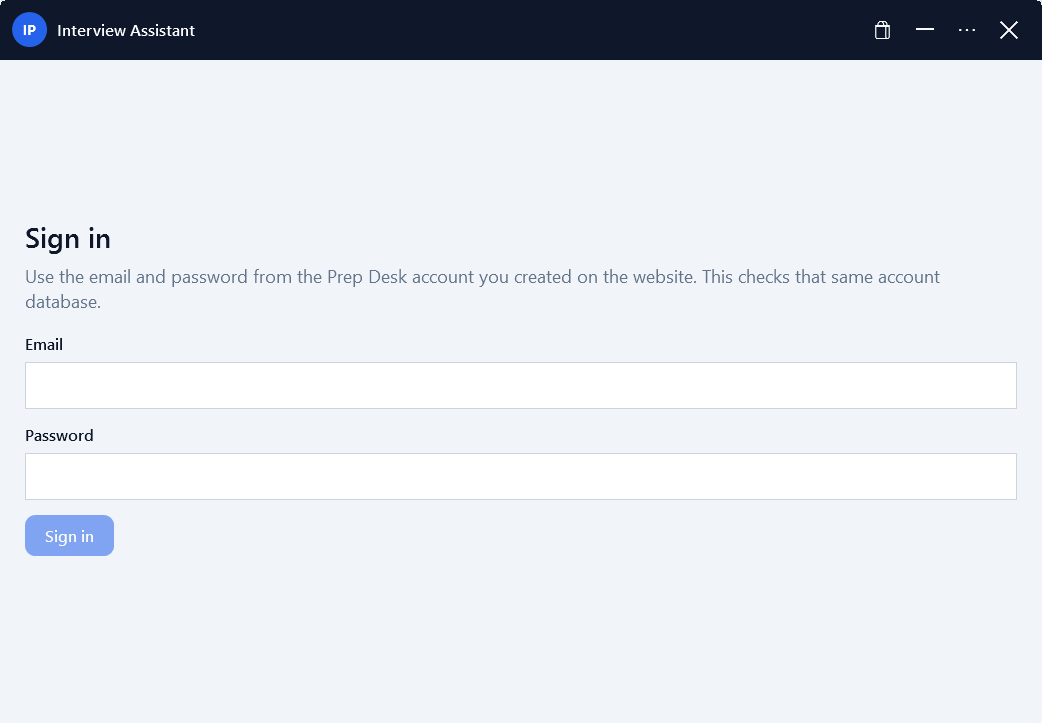
Sign-in screen — use your Prep Desk website credentials.
Email
The address you used when registering on Prep Desk.
Password
Your website password. Passwords are not stored in plain text in the app project.
Sign in
Checks your Prep Desk account and loads your plan (trial, monthly, yearly, or credits).
Step 3
Sessions list
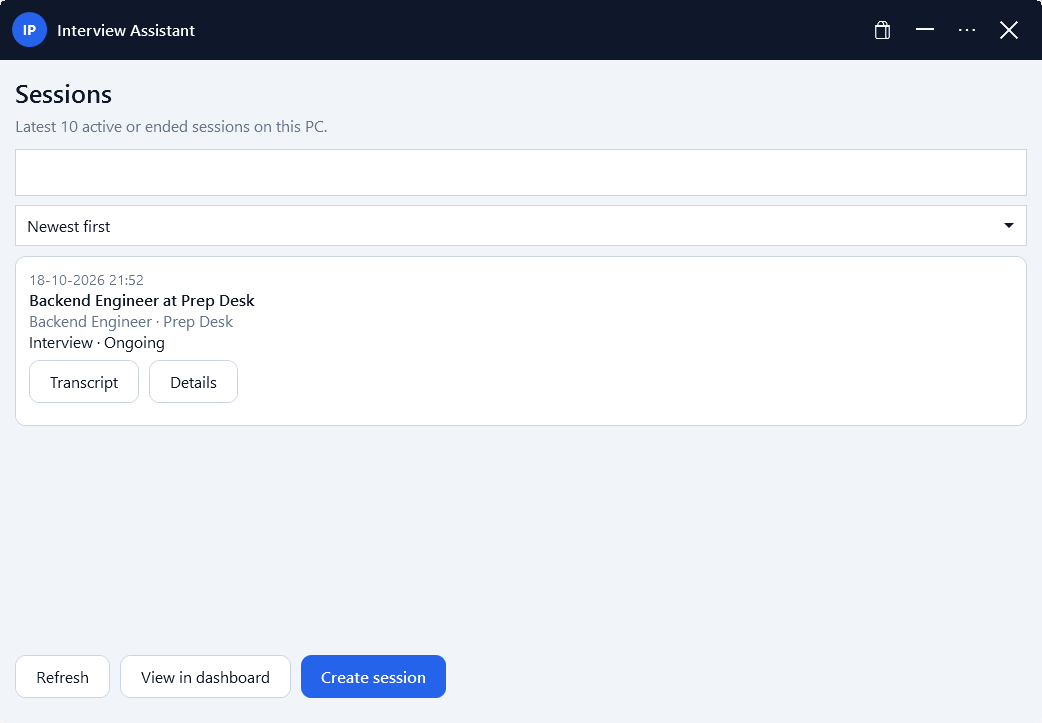
Home after sign-in — latest sessions on this PC.
Search
Filter the list by role, company, or other session text.
Sort (Newest first)
Change how sessions are ordered on this PC.
Refresh
Reload the local session list.
View in dashboard
Opens the Prep Desk web studio in your browser.
Create session
Start a new interview setup wizard.
Transcript / Details
On existing cards: open the saved transcript, or resume setup (Draft / Ready sessions reopen the Connect flow).
Step 4
Create a session
Click Create session. Fill in the job context so answers match the role you are interviewing for.
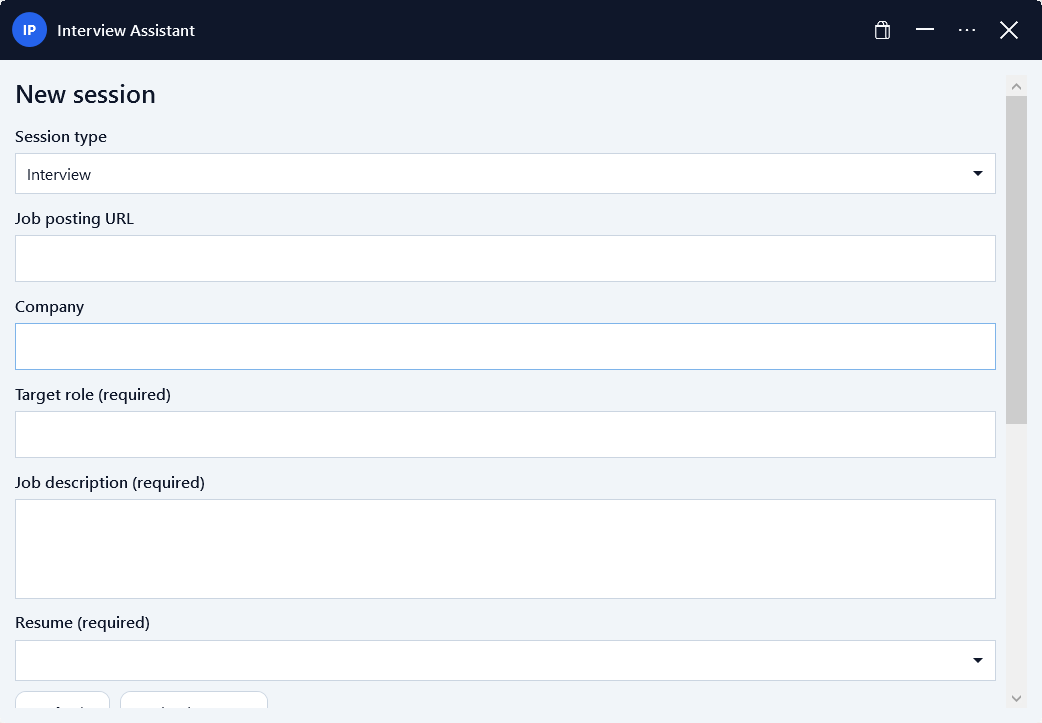
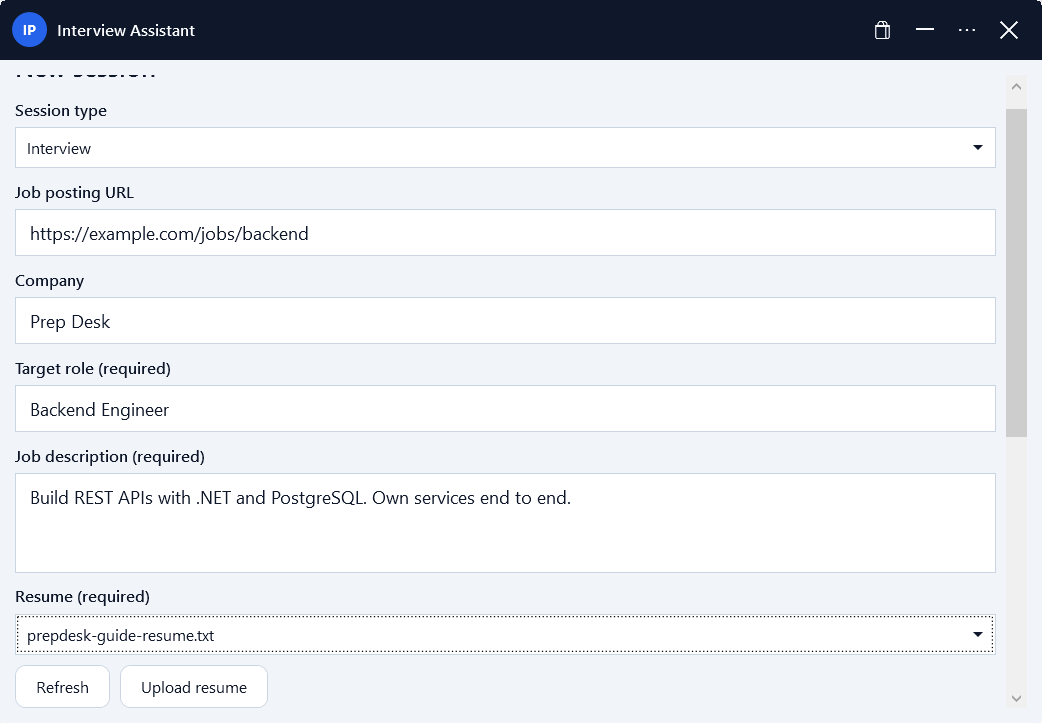
New session — job details and required fields.Example filled form with a resume selected.
Session type
Usually Interview for a live meeting.
Job posting URL
Optional link to the posting for your reference.
Company
Employer or team name shown on the session card.
Target role (required)
Title you are interviewing for (for example Backend Engineer).
Job description (required)
Paste the posting text so the model has role context.
Resume (required)
Pick an uploaded resume, or use Upload resume / Refresh.
Supporting documents
Optional extras via Upload document.
Response language
Language for spoken and typed answers (default English).
Model
AI model used for answers (for example Claude Haiku 4.5).
Answer style
How long answers should be (for example Concise).
Cancel / Next
Leave setup, or continue to session settings after required fields are filled.
Step 5
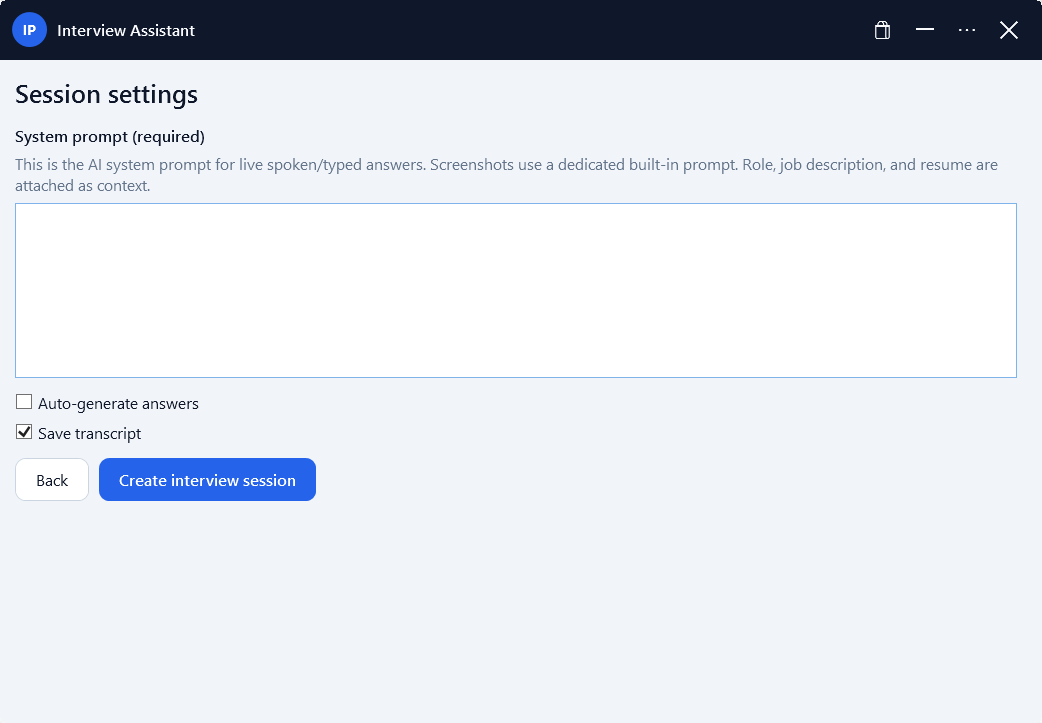
Session settings
Answer guidance and session behavior options.
Answer guidance (required)
Instructions for live spoken and typed answers. Your role, job description, and resume are included as context. Screenshot help uses a separate built-in guide.
Auto-generate answers
When on, the app can generate answers without waiting for Ctrl+Enter each time.
Save transcript
Keep a transcript of the session for later review (recommended).
Back
Return to the job details step.
Create interview session
Saves a Ready session and moves you to the Connect step.
Step 6
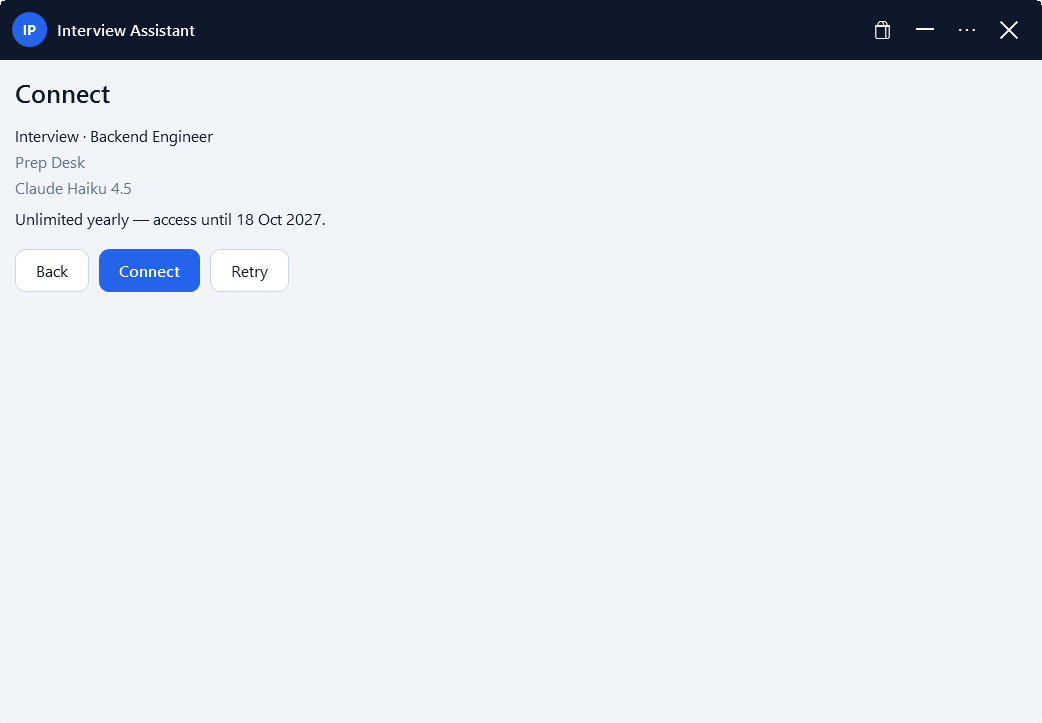
Connect
Final check before the live session starts.
Summary
Confirms session type, role, company, and model.
Plan line
Shows your Prep Desk access (trial, monthly, yearly, or credits) and expiry when applicable.
Connect
Starts the live session. If you are on the free trial, the 10-minute clock starts here — not when you only open the app.
Retry
Try Connect again if the first attempt did not go through.
Back
Return to session settings without starting the clock.
Step 7
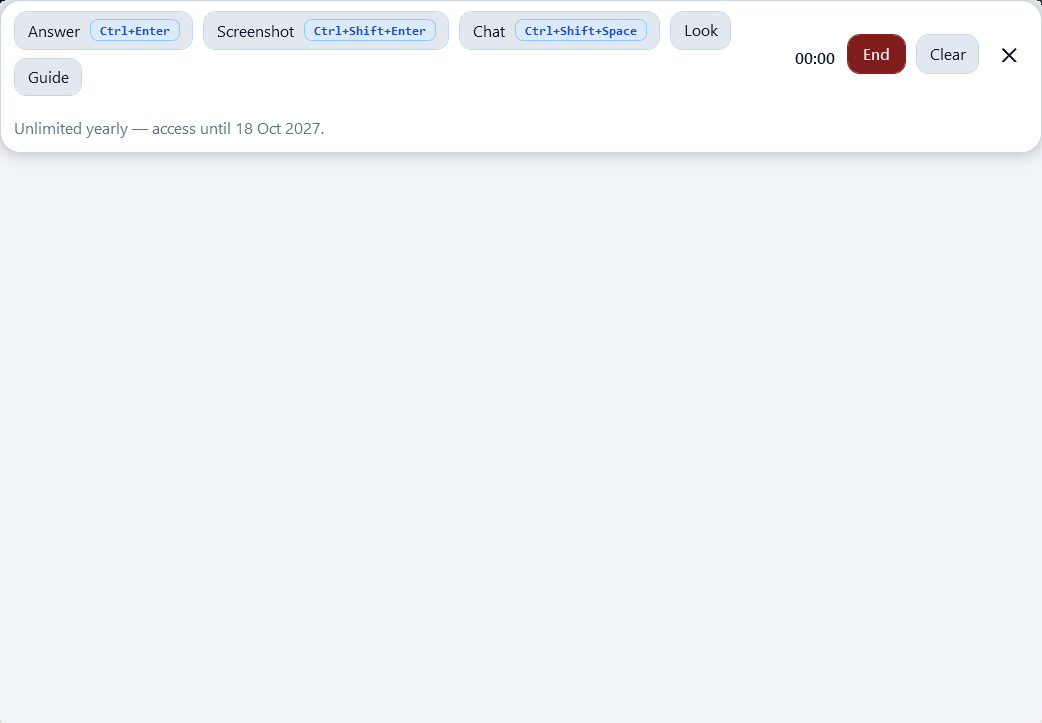
Live interview toolbar
Active session — listening status, timer, and main actions.
Answer (Ctrl+Enter)
Generate an answer from the live discussion or chat text.
Screenshot (Ctrl+Shift+Enter)
Capture the screen and analyze the visible question.
Chat (Ctrl+Shift+Space)
Open the chat box to type a question, then Ctrl+Enter to answer.
Look / Guide
Appearance settings, or the in-app keyboard shortcut list.
Status line
Shows listening / speaking state (for example “Listening to you and the interviewer…”).
Timer
Elapsed time for the connected session.
End
Stop the live session.
Clear
Clear the current answer / display content.
The assistant window can stay on top of your meeting app. Shortcuts also work when another window is focused (hold Ctrl as shown on each badge).
Step 8
Answer from the live transcript
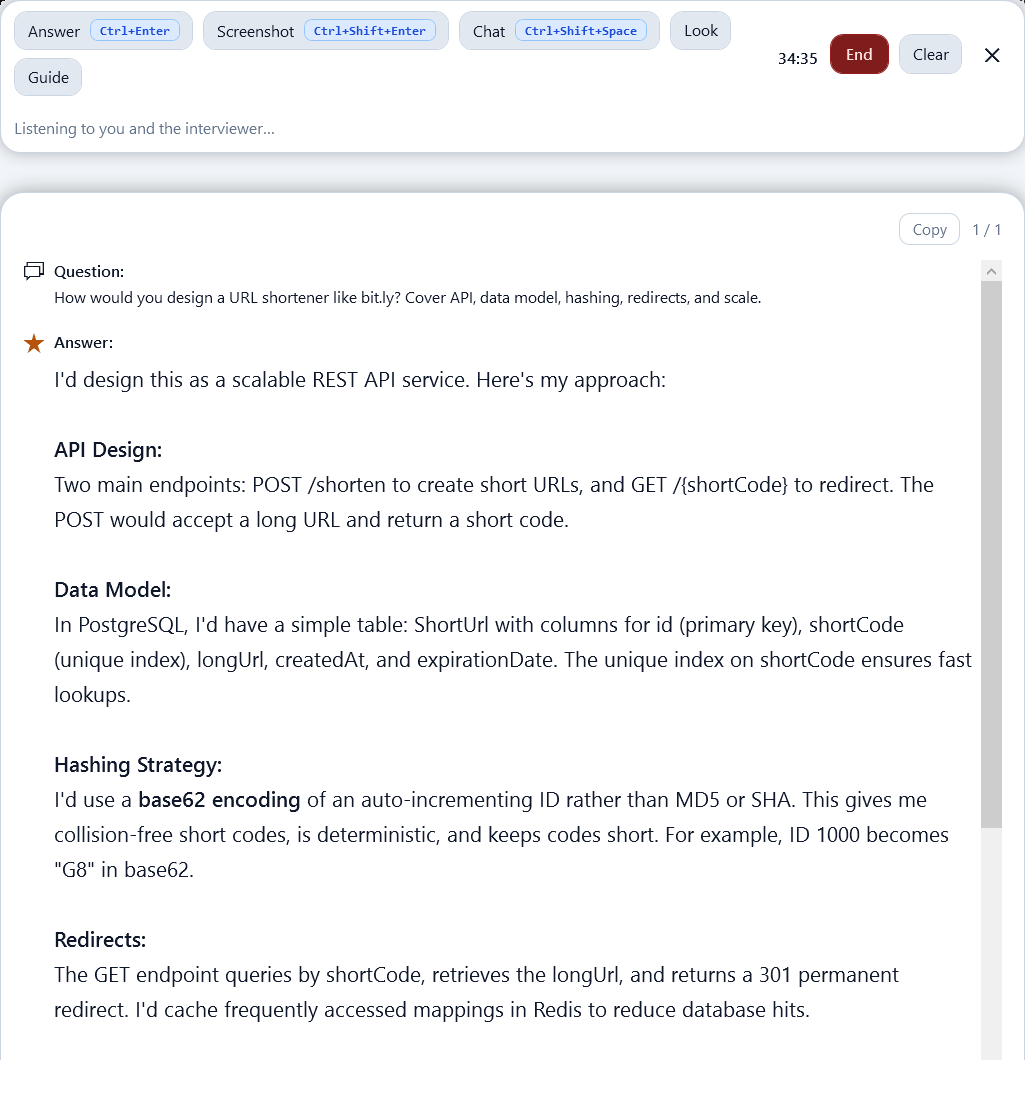
When the interviewer asks a system design question, the app picks it up in the live transcript. Press Answer (Ctrl+Enter) — you do not need to type in Chat. The Question and Answer panels open on the white background so you can read and copy the reply.
Example from the transcript: design a URL shortener — Question and Answer on the light UI (no Chat box).
Live transcript
The app listens to you and the interviewer. System design prompts appear as the Question when you generate.
Answer (Ctrl+Enter)
Builds a reply from the recent discussion plus your role, job description, and resume.
Question / Answer panel
Shows the detected question and the structured answer on the white background.
Copy
Copy the answer to the clipboard.
Chat (optional)
Only if you want to type a follow-up yourself (Ctrl+Shift+Space). Keep it closed for transcript answers.
Answer history
Use Ctrl+← / Ctrl+→ when you have more than one generated answer.
Step 9
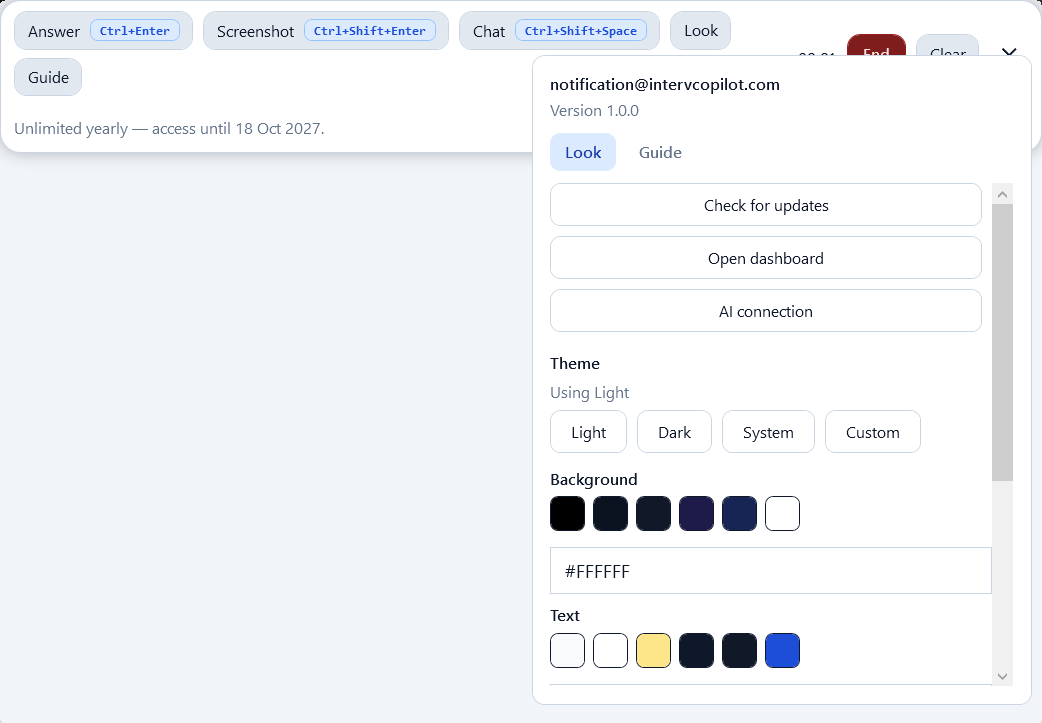
Look panel
Look — theme, colors, opacity, and account actions.
Check for updates
Look for a newer desktop build.
Open dashboard
Open Prep Desk in the browser.
AI connection
Configure or test the AI provider connection.
Theme
Light, Dark, System, or Custom.
Background / Text
Color swatches or hex values so the overlay fits your meeting UI.
Background opacity
Drag lower to let the meeting show through; text and buttons stay readable.
Transcript lines
How many transcript lines stay visible.
Sign out
Sign out of Prep Desk on this PC.
Esc
Close the Look / Guide panel.
Step 10
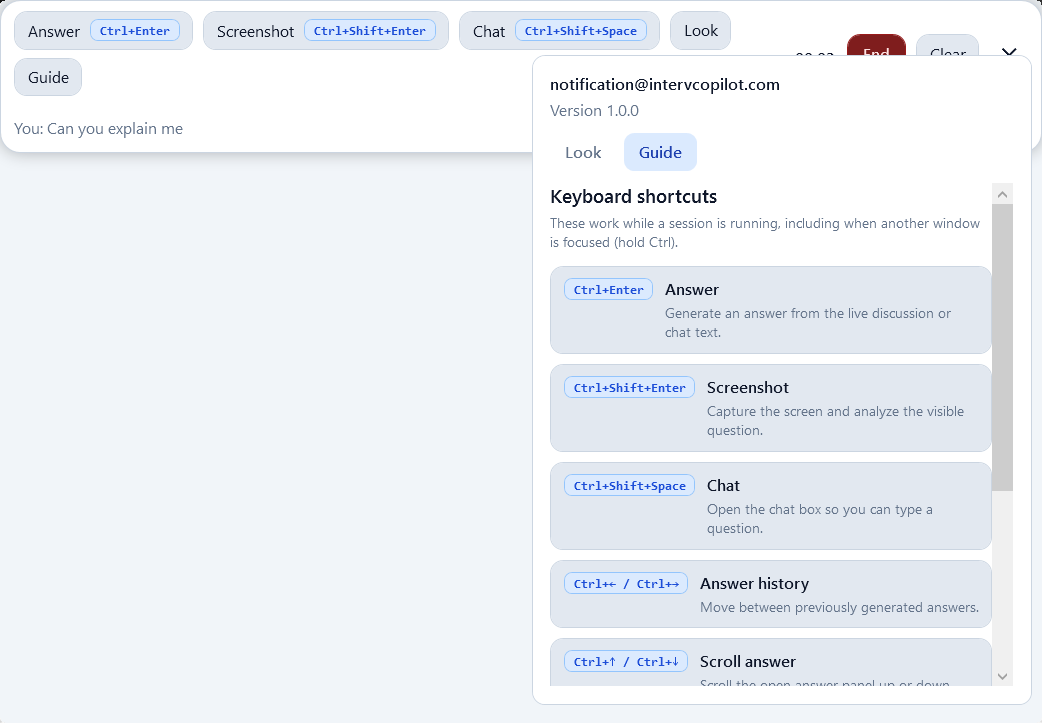
Keyboard shortcuts
Guide tab — full shortcut list inside the app.
Ctrl+EnterAnswer — generate from discussion or chat.
Ctrl+Shift+EnterScreenshot — capture and analyze the visible question.
Ctrl+Shift+SpaceChat — open the chat box to type a question.
Ctrl+← / Ctrl+→Answer history — previous or next generated answer.
Ctrl+↑ / Ctrl+↓Scroll answer — scroll the open answer panel.
Ctrl+Shift+ArrowSnap window — move the assistant to a screen edge or corner.
Ctrl+Shift+XHide pointer — hold to keep the pointer on your screen and hide it from shared video (changeable in preferences).
EscClose menu — close Look / Guide.
Open Guide anytime during a live session for the same list inside the app.